
Tattoo practice skin: what your practice sheet can—and cannot—tell you
A full practice sheet is not always a sign of progress. Learn to assess lines, joins and fills, compare attempts fairly and recognise what does not carry over to real skin.
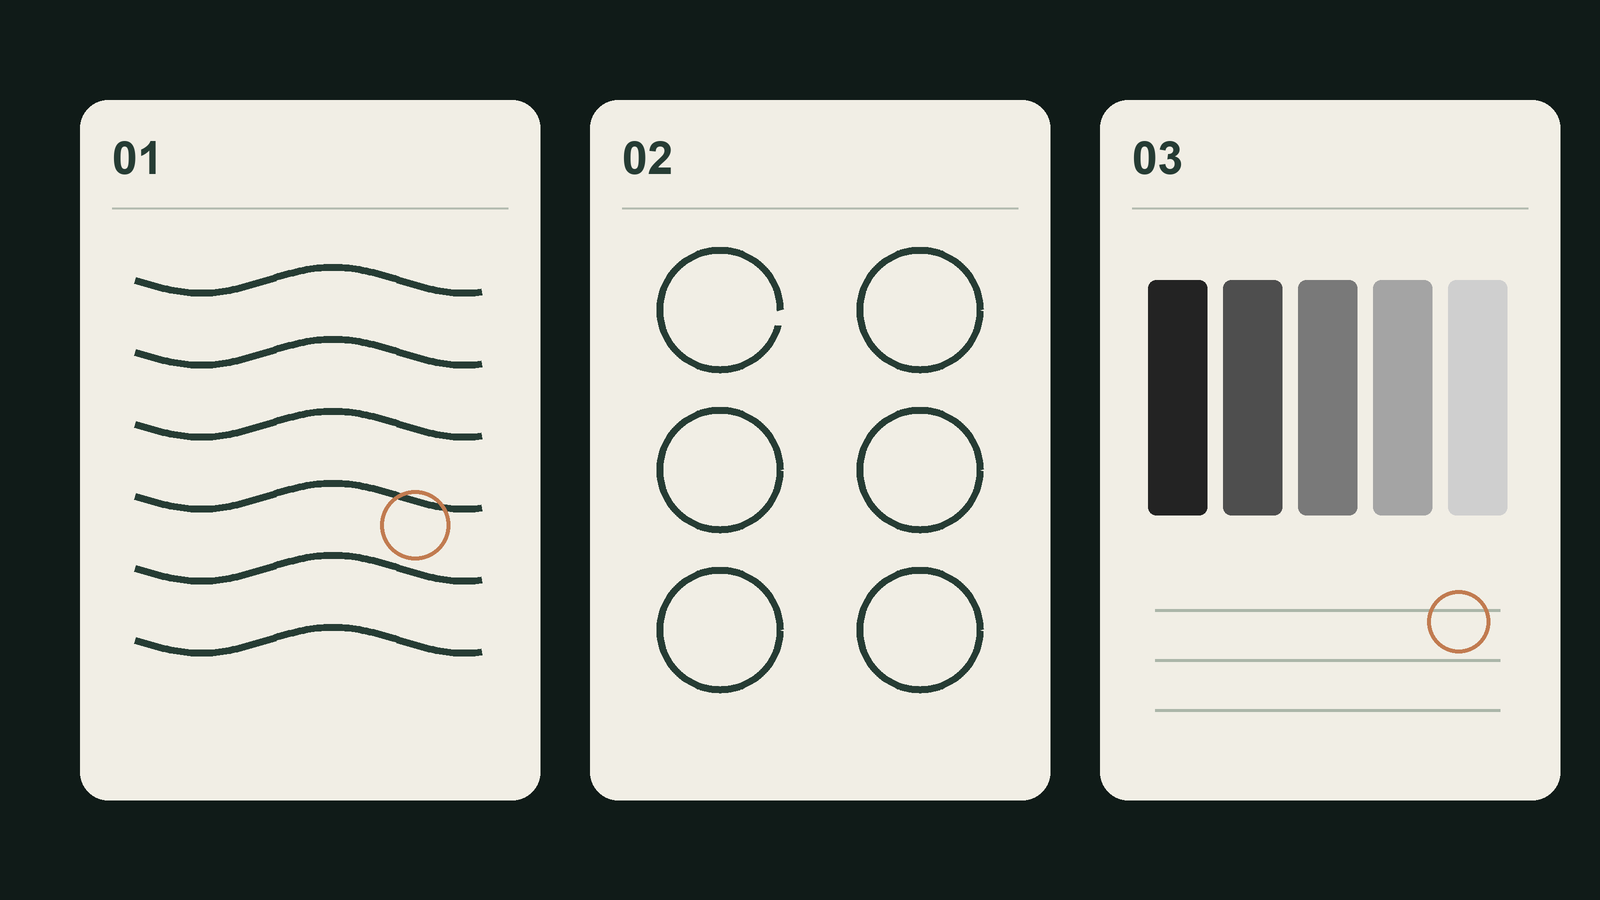
Your best line does not tell the whole story
You have finished a piece of tattoo practice skin. One curve looks great; three others would probably miss the crop if you posted a photograph. Have you improved? The answer is not just in the most impressive corner. A synthetic sheet lets you repeat movements and examine marks, but it cannot show how a tattoo would heal or how a person would respond.
Manufacturer Faked Skin draws that distinction between mechanical practice and the demands of working with human skin. It makes the sheet a learning tool, rather than a test you can pass by looking at a photograph. To get more from it, decide what you want to assess and keep the attempts that show how your work develops.
Before comparing lines, compare the material
Practice skin is a category, not a single specification. ReelSkin describes its sheets as handmade and notes that thickness and colour can vary. It also markets their stretch. A blanket claim that all synthetic skin behaves the same way is therefore not very helpful.
If you change materials and the result changes, you do not yet know how much came from your execution and how much from the sheet. Record the manufacturer and product reference where available, and check its instructions. A commercial thickness measurement describes a sheet; it does not tell you how deeply to tattoo a person. We have not physically tested these products: this comparison draws on their documentation.
Give each session a question you can answer
Instead of aiming to fill another sheet, choose a small question. Do curves reach their intended endpoint? Does the spacing between lines stay consistent? Do the joins stand out more than the rest of the outline? Agree an exercise with your instructor and write down the aim before starting, so the result does not tempt you to move the goalposts.
A complex design combines composition, proportions, tonal values and execution. That can be interesting, but it also makes it harder to isolate what you are learning. To assess continuity, a simple shape with a few joins offers a clearer view. Keep the original reference beside the practice piece: without it, an intentional variation can look like a mistake. Drawing on paper remains a separate part of learning, with exercises of its own.
Describe the mark before explaining its cause
Look at the whole piece first, then inspect details. For a line, examine its path, continuity and changes in width. At a join, look for a gap or a visibly heavier section. In a fill, locate areas that appear lighter than their neighbours. You can point to these observations without guessing what the hand did.
“The line breaks here” describes a result. “I need more voltage” proposes a correction. Between those statements lies missing context: the material, reference, equipment and observation of the exercise. Bring that distinction into a review with your mentor. A weak-looking result does not automatically identify which setting to change, and darkening it afterwards may hide the information you needed to study.
Three joins worth learning to spot
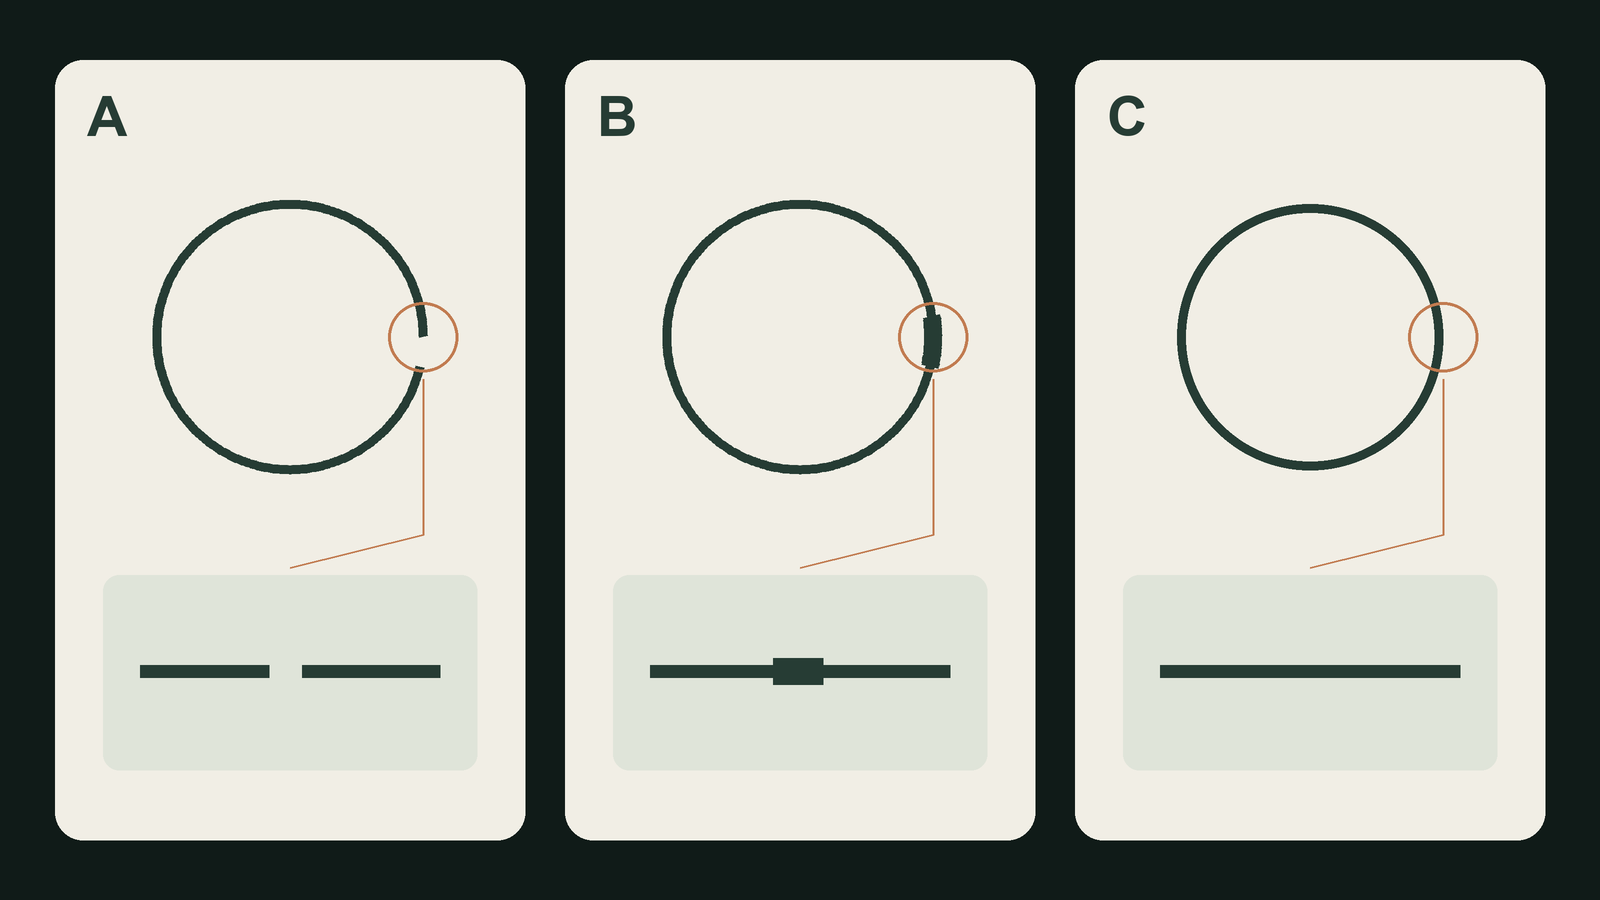
What you can record—and what remains unanswered
Use this comparison to frame a useful review question. It does not turn a mark into a diagnosis of equipment or technique.
| What to check | Useful observation | Conclusion not yet established |
|---|---|---|
| Line | There is a break at a particular point along the line. | The machine needs more power. |
| Join | The closure is wider than the rest of the outline. | A different needle will solve it. |
| Fill | One area looks lighter under the same lighting. | The result would heal like this on a person. |
| Comparison | The second series has fewer gaps on this sheet. | The skill will carry over to every material. |
Keep the series, not just the successful attempt
When an exercise involves repetitions, number them and photograph the full set before selecting a detail. Seeing five attempts together helps distinguish a repeated improvement from one successful mark. There is no need to invent a score out of ten: identify where the issue you wanted to review appears.
Imagine five shapes with the same closure. Four have a gap and one does not. The continuous join deserves attention, but the next question is what happened during that attempt and whether you can repeat it within the assigned exercise. If you touch up the whole series before documenting it, part of the comparison disappears. Keep the versions you would not post on social media too; they often contain the most useful questions.
What fake skin cannot show
A synthetic sheet does not experience pain or go through healing. Faked Skin lists these differences among the limits of a practice surface and separates mechanical repetition from the training needed to work with people. The finished appearance of a practice piece cannot demonstrate those wider skills on its own.
Nor is it an anatomical reference for choosing depth. A mark on the back describes what happened to that material, not where pigment would sit in a body. If your question is why ink can spread beyond a line, our blowout guide explains a different problem. Reading the two together helps clarify the limits of simulation without turning a practice sheet into a map of living skin.
Take photographs that reveal rather than conceal
When comparing two practice pieces, try to keep lighting, framing and camera distance similar. Include an overall view and a close-up of the area you want to discuss. If glare hides an outline, adjust the lighting and take the photograph again; do not try to reconstruct an invisible detail afterwards.
Keep the original file and avoid smoothing, filters or contrast changes that remove differences. Add the material name and date to your record, and label the work as synthetic-skin practice when sharing it. An attractive photograph can showcase a design; a faithful photograph lets you discuss what happened. Be clear about which job you need the image to do before deciding how to present it.
A short record for your next review
We suggest keeping five pieces of information with each series. They support your training instructions and give the conversation a clearer starting point than simply saying that an exercise went badly.
- Aim: one visual feature to review, such as continuity or spacing.
- Reference and surface: the design, material and available product identification.
- Record: date, attempt number and filenames for the full view and detail.
- Observation: what you can see and where, kept separate from possible explanations.
- Next step: the correction agreed with your instructor and any question still unresolved.
Make the next sheet answer something
Before buying another material or attempting a harder design, return to the original question. Can you describe a specific difference? Were the comparison conditions similar enough? Do you know what you want your mentor to review?
The value of practice skin is not measured by the number of sheets you accumulate. A well-documented exercise leaves you with a clear observation and a worthwhile next task. If today you can only pinpoint where a curve breaks, you already have a better question than “Which machine should I buy?”.
Sources and editorial notes
- ReelSkin — Synthetic Tattoo Practice Skin, Large
- Faked Skin — Practice Skin vs Human Skin
- The Fine Line Academy — Equipment and synthetic-skin practice
Manufacturer and organiser facts are linked above. Our selection and reading advice expresses TattooXpert’s editorial judgement.
Our editorial methodKEEP EXPLORING.
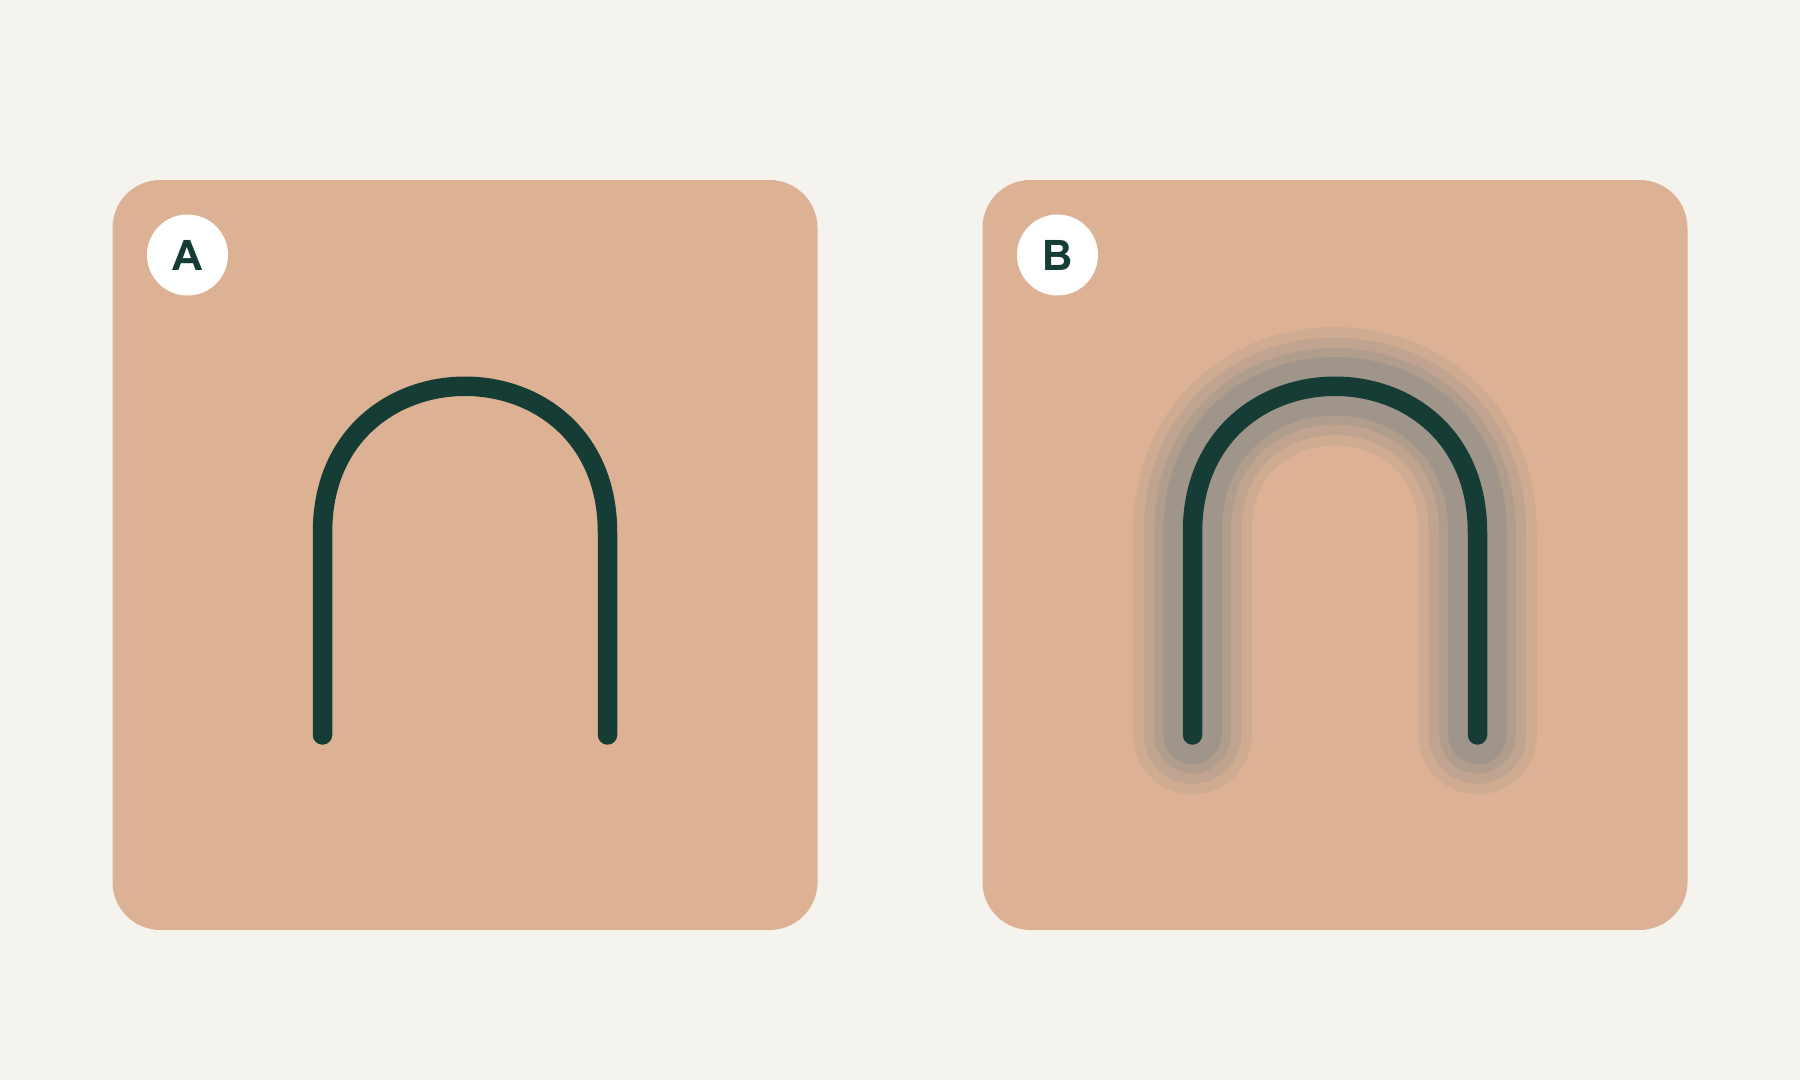
Why does tattoo ink spread? Understanding blowout and skin layers
A halo outside a tattoo line is not the same as healing or gradual ageing. Learn what blowout means, where pigment sits and what to observe before drawing conclusions.
TattooXpert
Tattoo drawing exercises: practise lines with a clear purpose
Work on straight lines, curves and line weight on paper, then use them in a small original drawing. Learn what to look for and what to practise next.
TattooXpert